[Touch Switch P10 Series] Nuts removal procedure when purchased with U-cover
The Touch Switch P10 series is delivered with two nuts (standard accessories) pre-installed on the switch body. (Fig. 1)
If you have purchased the optional U-cover (rubber boot protection cover), you will need to remove the U-cover and the nuts by yourself when installing it on the machine. Follow the procedure below.
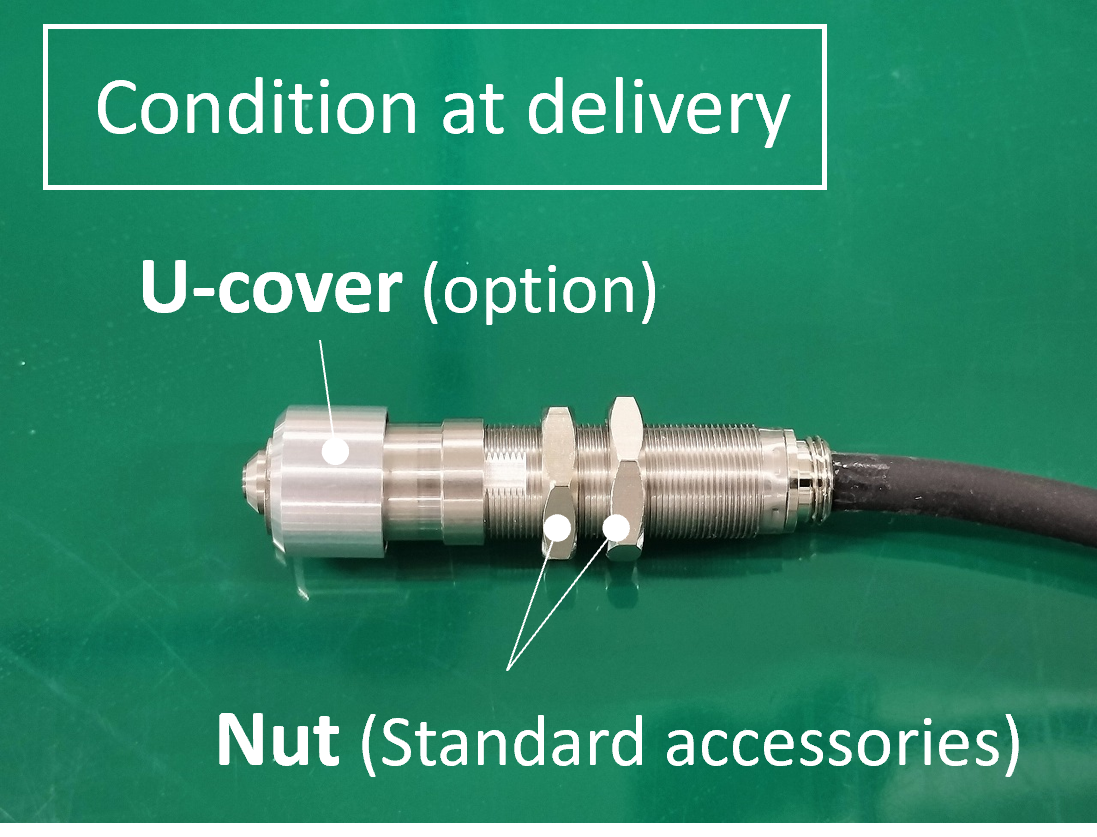
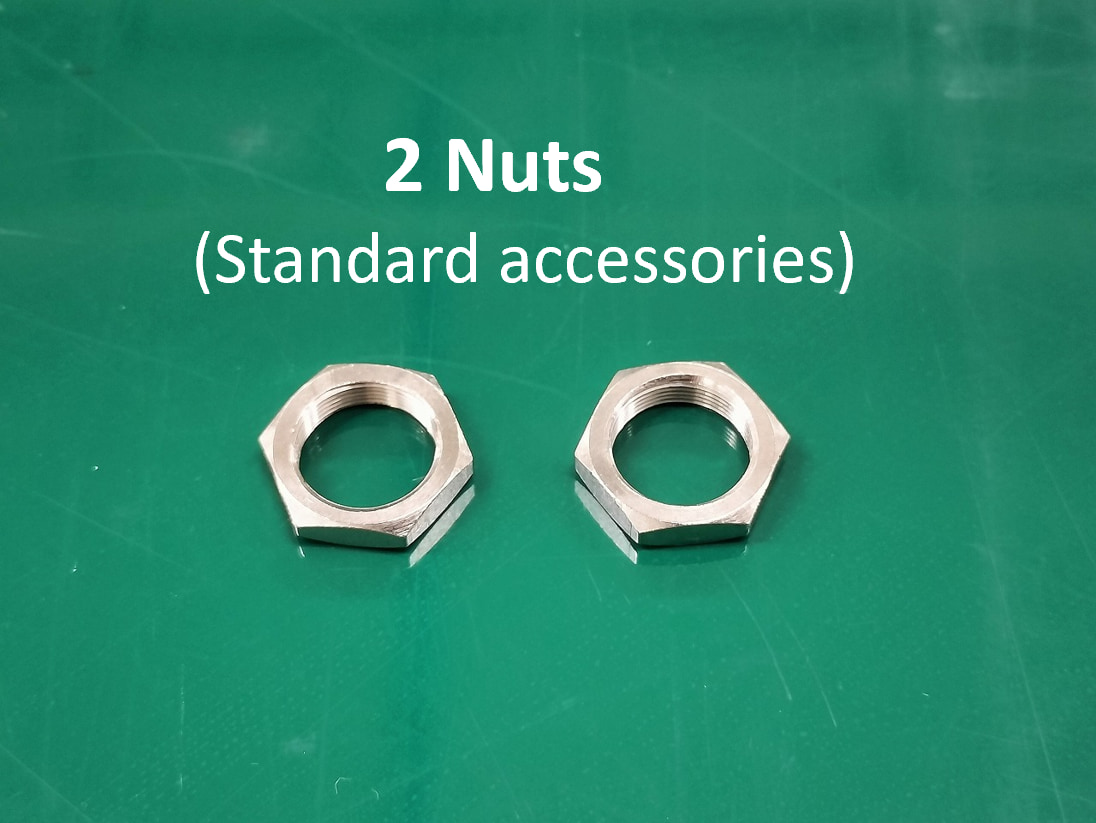
Table of Contents
How to remove two fixing nuts
Step 1. Remove the U-cover
First remove the U-cover.
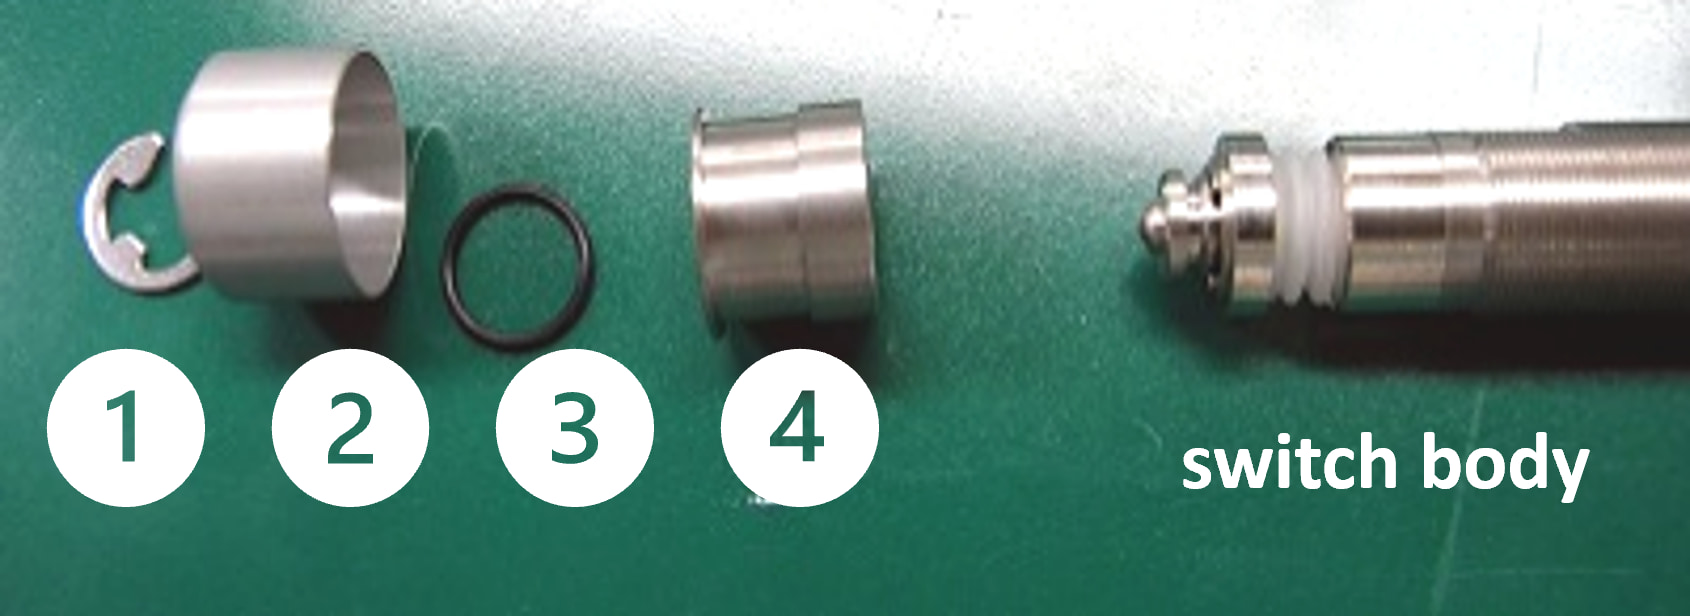
①Retaining Rings - E Type ②U-cover ③O-ring
Turn the ring (④) counterclockwise to remove it.
Step 2 Remove the nut
Once the U cover is removed, remove the nut and install the switch into the machine.
Step 3. Install the U cover
Reinstall each part in the order of ④, ③, ②, ①.

④Tighten the ring until it stops.
Install the O-ring on the step of the boot presser.
②Put the U-cover on the boot presser.
①Please stop the Retaining Rings - E Type so that the U cover does not slant.
Finally, press the contacts to make sure they move smoothly.