A replacement of a “Pin gauge” significantly reduced the inspection time.

Automobile industry
The client is a car parts manufacturer that produces engine parts for a major automakers. A representative of quality control division consulted us on workpiece inner diameter inspection.
Table of Contents
Client’s Issues
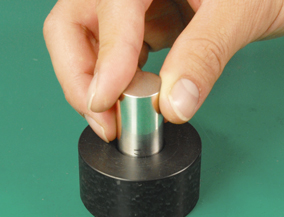
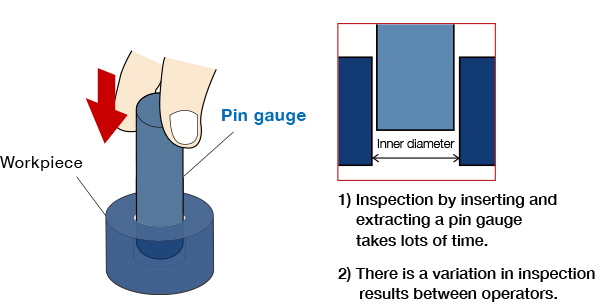
A “pin gauge” has been used for measuring workpiece inner diameter in the full inspection process, however, it takes lots of time to insert and extract it.
Also, since the diameter is measured by hand, there are variations in inspection results between operators.
This can be a cause of defective products.
When he was looking for a sensor that can easily measure an inner diameter , he got to know Metrol product by a sales visit.

The main focus of the issues
Inner diameter inspection using “Pin Gauge” takes lots of time.
Due to manual inspection, there is a variation in inspection results.
Metrol’s suggestions
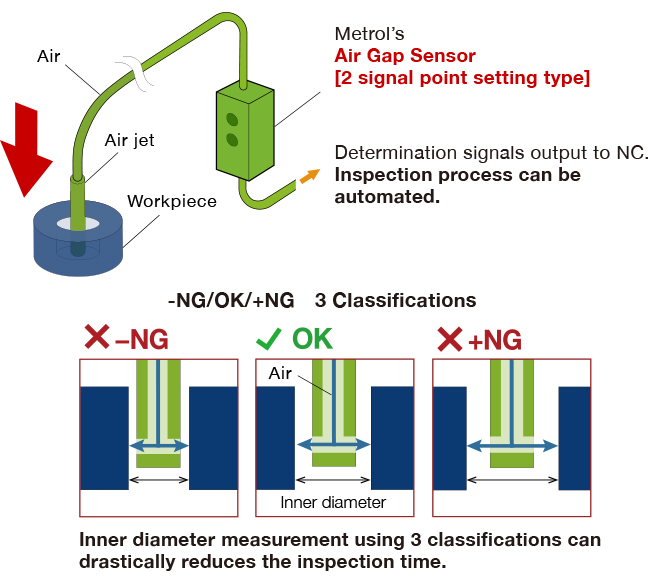
Metrol’s “Air Gap Sensor [2 signal point setting type]” can take 3 classifications of -NG/OK/+NG and easily determine pass or fail of the workpiece inner diameter with ±0.5µm repeatability.
Also, the -NG/OK/+NG determination signals are output to NC, enabling automation in the inspection process.
Inspection time can be reduced significantly.

Improvements
3 classifications of -NG/OK/+NG by "Air Gap Sensor" reduced the inspection time significantly.
Eliminates the variations in inspection results by measuring the inner diameter with ±0.5µm repeatability
Comment from Metrol representative
"Air Gap Sensors" introduced here have been highly evaluated by people in quality control division.
If you have any trouble with quality check, please just contact us!
For further information about the products used in this application
Air Gap Sensor [2 signal point setting type]
Realize 3 classifications (-NG, OK, +NG) of workpiece inner diameter!
