Drastically reduced the cost by replacing “Air micrometer”.

Automobile industry
An automotive parts manufacturer that produces bearing components for major automakers.
A representative of the quality control division inquired us about "internal diameter inspection" of the bearings.
Table of Contents
Client’s Issues
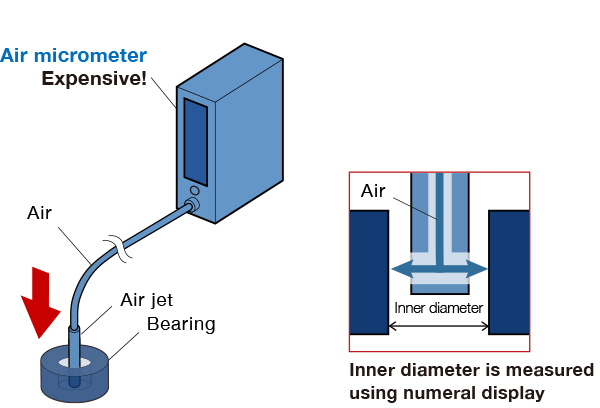
An "Air micrometer" has been used when inspecting inner diameter of the bearings, however, the device was expensive and this was a financial burden.
We reseived an inquiry looking for an affordable sensor capable of inner diameter measurement.

The main focus of the issues
An "Air micrometer" is expensive.
Metrol’s suggestions
In most case, inner diameter inspection only needs pass/fail (OK/NG) results, and the number display is often unnecessary.
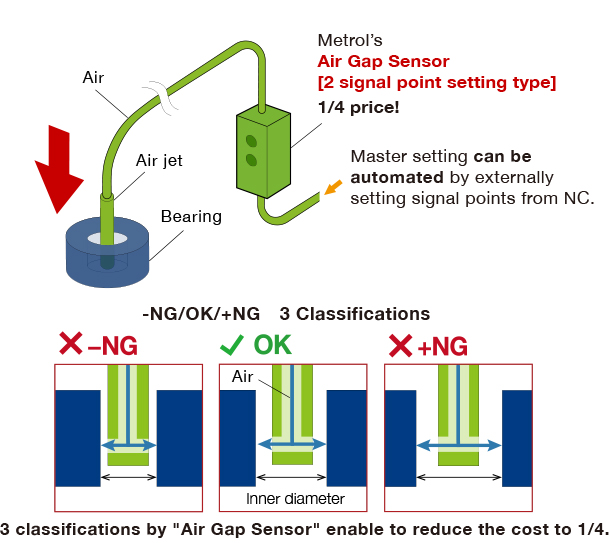
Metrol’s “Air Gap Sensor [2 signal point setting type]” takes 3 classifications of -NG/OK/+NG and easily determines pass or fail of the workpiece inner diameter with ±0.5µm repeatability.
Also, the signal points(-/+ Limit points) can be input from NC without pressing the master setting button on the sensor.
The cost for inner diameter inspection can be reduced to 1/4 by replacing expensive "air micrometer".

Improvements
3 classifications by "Air Gap Sensor" enable to reduce the cost to 1/4.
Comment from Metrol representative
"Air Gap Sensors [2 signal point setting type]" introduced here have been selected by many manufacturers for low-cost but precision inner diameter inspection.
If you use expensive "air micrometers" and need to reduce the cost, please do not hesitate to contact us.
For further information about the products used in this application
Air Gap Sensor [2 signal point setting type]
Determine -NG/OK/+NG of inner diameter of the workpieces!
