Detects flaws in the machining process, reducing the inspection process

Precision metalworking industry
A precision metalworking manufacturer that produces motorcycle components.
A representative of the production engineering section consulted us on "defective products" in manufacturing process.
Table of Contents
Client’s Issues
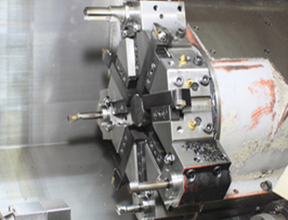
A turret lathe was used for precision machining of bar materials, but there were problems with the accuracy of the machined workpieces.
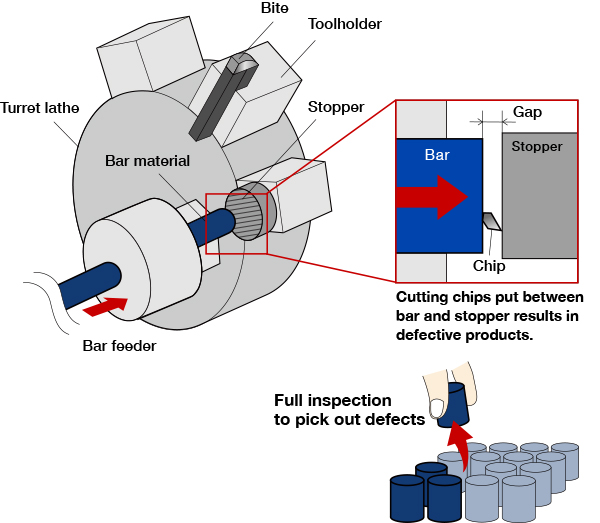
Bar materials fed with a bar feeder got cuttings caught between the bar and stopper surface, causing the specified bar dimensions to be fed incorrectly, propagating errors into subsequent processes.
Full inspection after machining allows us to pick out the defective products;
however, this is a manual process that causes problems due to the work hours required.
We received an inquiry looking for a dimension-measuring sensor that can be retrofitted to turret lathes in order to detect defective machine processing, having seen our products at the JIMTOF 2014, Japan International Machine Tool Fair.

The main focus of the issues
Cutting chips caught between the bar and the stopper cause defective products.
Full inspection for defective products takes lots of man-hours.
Metrol’s suggestions
Installing a wired sensor to a turret lathe is difficult due to the wiring required.
In addition, the abundance of noise and shielding in factory environments makes consistent communication via infrared type sensors unreliable.
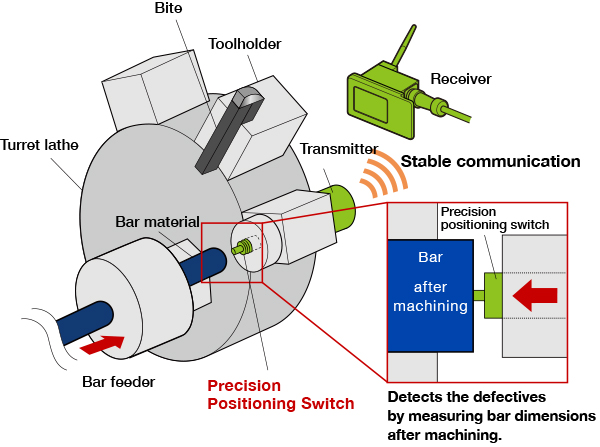
Employing 2.4GHz FSK wireless system, Metrol's "Wireless switch" realizes stable communication without being interrupted by noise and obstacles in factories.
Reliably detects defective products within the machine by directly mounting to a turret tool holder to measure bar dimensions with repeat accuracy of 1μm.
This eliminates the inspection process, drastically reducing work hours required.

Improvements
By measuring bar dimensions within the machine, defective products can be detected in the machining process.
The full defect inspection process can be eliminated, drastically reducing work hours required.
Comment from Metrol representative
The full manual inspection process not only takes up work hours, but may overlook defective products, resulting in complaints from the customer.
It is important to eliminate such tedious inspections by incorporating them into the machining process in order to improve product quality.
Please consult with us at Metrol to find a solution through wireless sensors within machine tools, or through internal machine measurement for detection of workpiece defects.
For further information about the products used in this application
Wireless Switch for Seat Checking
Best suited for precise seating confirmation in 5-axis machining centers, pallet changers or rotary tables.
